How to Use Ring Light to Make Videos
The first time you use the ring light to create video, you may be a bit confused. Just like anything else, it takes some time to find accurate answers.
Product description
The first time you use the ring
light to create video, you may be a bit confused. Just like anything else, it
takes some time to find accurate answers. This article guides you how to use a ring light for video?

Ring Light Lighting for Video:
Photography
Preparation
Whether you are going to take a
photo or video live streaming, choose a location in advance and consider the
effect of natural light entering the studio through the window.
Prepare
a Reflector
By increasing the light-emitting
area to obtain soft surface light.
According to the live needs, you
can choose Softbox, reflective umbrella or umbrellas Kit cover as an accessory
to soften the light.
You can use foil or card paper
for soft light in front of the light source, or you can shine the light on the
foam board and bounce it back to the character's face.
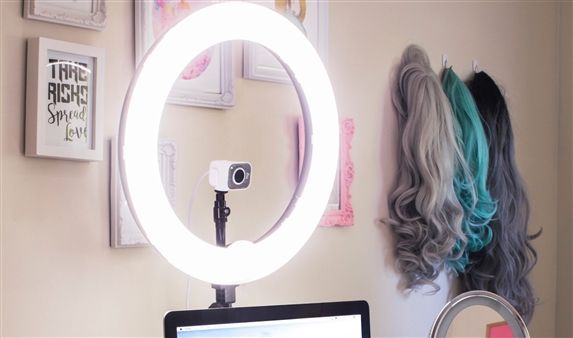
Buy a Ring Light for Live Streaming:
Buy fill light ring lights for
live streaming at AIXPI. The biggest feature of the ring selfie fill light is
to enhance the shooting effect. Its structure is necessarily ring-shaped, and
there can be a mobile phone clip to hold the mobile phone for live broadcast,
which is very convenient.

The ring selfie light has three
brightness adjustments, which can be adjusted according to needs and different
scenes. Compared with the ordinary fill light, the ring-shaped light has a
larger light emitting surface, and if there are some soft light devices, the
light will make the subject more charming when using a ring light.
How to Use a Ring Light for Video?
Step 1: Place the Main Ring Light
The main light is usually called
the key light, and its position depends on the effect you are looking for.
However, the main ring light is generally placed on the side of the main body
at a 45° angle to the main body, and its horizontal position is usually two or
three feet higher than the camera.
Place the main light on the right
side of the main body and make a 45° angle with the main body. This is just one
possible position. Different lighting arrangements will produce different
effects. In the actual placement, you can choose several alternative positions,
test the lighting, and choose your favourite lighting effect.
Step 2: Add Auxiliary Lights
After placing the main light, it
depends on whether you need it and the economic situation, because you have to
buy at least 2 ring light.
The main light should dominate,
which determines the basic tone of shadows and highlights.
One of the reasons for adding
auxiliary lights is that shadows usually look darker in the photo than they are
seen with the eyes. Auxiliary lights can make the photo more natural.
When placing the auxiliary ring
light, make sure that it does not project the camera's shadow into the picture.
Keep the ring light higher than the camera, or position it on the side of the
camera. If you place the light next to the camera, its position should be
opposite to the main light.
The auxiliary light should be far
away from the subject being photographed. You can determine the position of the
auxiliary light according to the different affects you want to create. Slowly
move the auxiliary lamp backwards while observing the effect it projects on the
shape under the main ring light illumination, and then choose the location you
are most satisfied with.
Step 3: Tripod to Stabilize the Camera
If you have no enough budget for a camera tripod, please find a shelf to place the camera to stabilize it. If you want a camera tripod, just search for "tripod" on Amazon, and you can get it for less than $20~30. But when you buy AIXPI ring lights for photography, you don't need to buy an additional tripod.
Our ring lights are with tripods and
mobile phone brackets, which can easily fix ring lights, mobile phones, and
mobile devices such as iPad.
How to Install
AIXPI 10" LED Ring Light Tripod?

Step 4: Choose the Colour Temperature
Depending on the mode and
brightness adjustment, the ring light may "cool" or "warm".
According to the different subjects, through brightness and mode conversion to
find the most suitable colors temperature. You can adjust the colors temperature
with just click the conversion button, from warm to cold, which is the main
difference between 3 modes of lighting.

It is best not to mix light with
different colors temperatures. If one ring light uses cold light and the other
uses warm light, it may result in incorrect colors balance.
Buy Ring Light for Video Conferencing:
AIXPI provides in a variety of
sizes LED ring lights with 30 colors temperature to focus on providing live
broadcasters with high-quality lighting effects and creating the most popular
KOL live room. Our product includes live broadcast ring lights,
brackets, tripod and many other live streaming ring light accessories. Whether
it is only ring light or a triangular bracket for camera, a standard 1/4-inch tripod threaded rod is
provided, and you can match a single unit or kit to meet your live streaming
studio needs.

Summary:
For video live, the lighting
position should be reasonably arranged or the video picture should be improved
by changing one's position. Because it uses indoor artificial light, it is
easier to control the light source. The above is the easiest way to use AIXPI
ring light for video recording, suitable for live beginners’ guides.
Related
Articles:
Buy the
Best 18 inch Ring Light with Stand
The Benefits of
Using Ring Light
Where to Buy a
Ring Light Online
